So you’ve decided to upgrade your living room or basement to a real home theater, complete with a projector. Excellent decision. Modern projectors are bright, easy to use, and offer an image many times the size of a lowly television, no matter whether you chose an affordable 1080p model or a top of the line 4K light cannon.
For the biggest screen possible in your home, the best projectors can create truly massive images. In many cases they cost less than the biggest TVs. From movies to TV, PlayStation 5 to Xbox Series X, there’s just something more compelling and engrossing about big-screen entertainment.
The catch is that projectors require more setup and hassle than TVs. You’ll need to find the right space, of course. Then there’s figuring out the right settings, dialing in the focus and more. The payoff at the end, as you convert the room into a home theater, is well worth it. You might never want to go back to a tiny TV ever again.
Contents
Projector Setup Tips
As someone who has used a projector as his main “TV” for over 6 years, not to mention reviewing them professionally even longer, I’ve set up countless projectors. Seriously, I tried counting. I stopped at “a lot.”
1. Find the right location
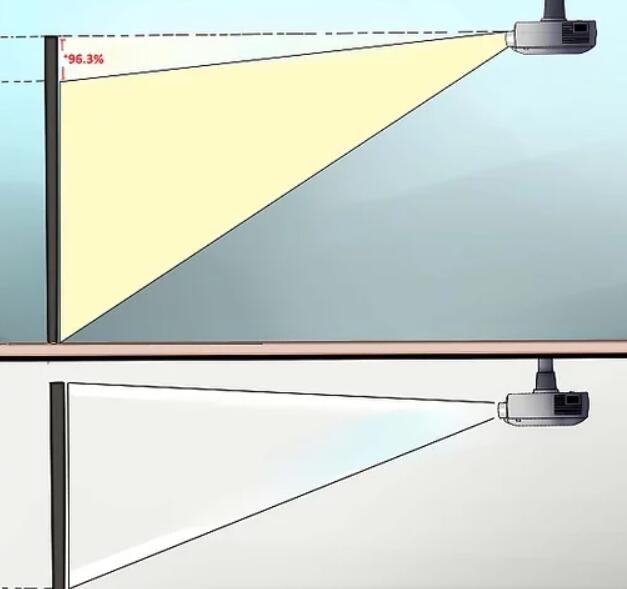
The first step is figuring out where you’re going to put the thing. You’ll need enough space for the projection itself — either a screen (recommended) or a patch of blank wall (as close to white as possible). The bigger that space, the better. Projectors can deliver images as small as 40 or 50 inches and as large as 300, measured diagonally. Keep in mind that larger images will be dimmer and, depending on the projector, may start to expose the individual pixels (aka “screen door effect”), especially if you sit close to the screen.
Bigger images also require you to move the projector further back. And unless you mount the projector on the ceiling, you won’t be able to sit in the path of the beam, so consider the seating arrangement.
Most projector companies offer screen size calculators on their websites, letting you figure out how far back you can place the specific model you’re considering for the size screen you want.
2. Choose the right screen
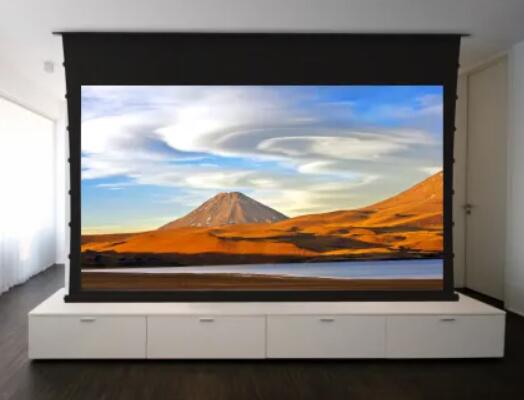
In a pinch, you can project the image from a projector directly onto a wall, or hang a white bedsheet. If you’re setting up an entire home theater, though, it’s worth it to invest a portion of your budget into a high-quality screen.
The importance of the screen to your viewing experience can not be understated. Few homes have many completely blank, white walls the size you’ll want for a projector screen. Many projector screens are also specifically designed to heighten contrast or otherwise improve image quality, which can be a big help in rooms with lots of ambient light or other constraints. Others have micro-perforations so you can put speakers behind the screen for true theater surround sound.
3. Set up the Screen with Projector
Setting up the screen is quite easy, and it entirely depends on the type of screens you have bought. Generally, for indoor use, wall hanging retractable or portable projector screen are used as they are quite easy to fit in the wall. You just need to make a hole in the wall, or if there is an existing knob in the wall, then you can easily hang the screen.
However, if you don’t want to ruin your wall by making a hole, then you can use a screen with stand. While setting up the screen, you should stretch it properly.
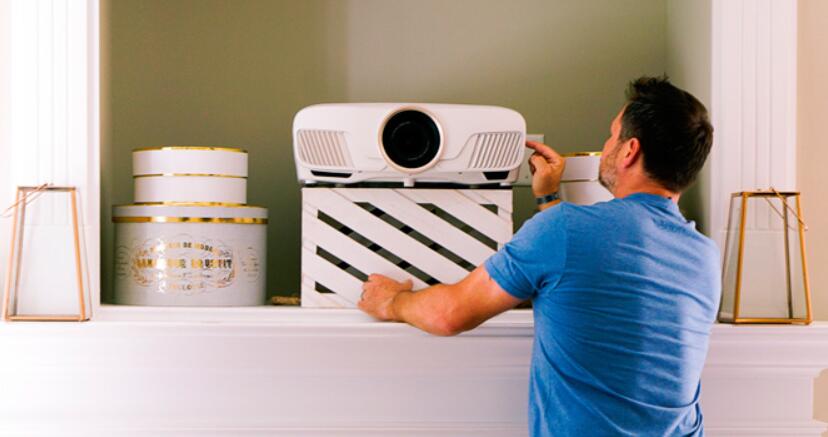
4. Introducing the Projector in The Designated Area
The trickiest part of the setup process is to place the projector at the right place so that it can offer the best projection. Generally, projectors come with three projection type:
- Front
- Rear
- Ceiling
For regular indoor setup process, it is always recommended for ceiling or front table projection as it is easy to set up. However, if you plan to opt for rear projection, you would either require a large space or ultra short throw ratio with rear projection compatible screen. For rear projection, you will have to opt for the 180-degree horizontal switch so that the frame properly fits in the display.
If you are going for front table projection, first you have to opt for a small table that has appropriate height so that it can project a squared image on the screen. You have to fiddle with the height of the table until it reaches the right height.
Now after getting the right height, you need to keep the projector in the middle of the screen so that it can adequately cover the screen. However, if you fail to do so, you will get assistance from the calibration option of the projector.
You can also opt for ceiling projection as it will save a lot of your space in the house and allow you to move in the room freely. While hanging the projector in the ceiling, it should be placed upside down, and you won’t have to worry about upside image because you can flip the image.
Determining the distance is the complicated part of ceiling installation, but you can solve it by finding it in the floor or from user’s manual. Then mark the spot with the help of a pole on the ceiling and screw the mount into position. For flexibility, you can attach the projector to the wall mount whose height can be adjusted. Wall mounted projectors generally are used in schools, colleges, and office meeting room.
5. Plug everything in and turn it on
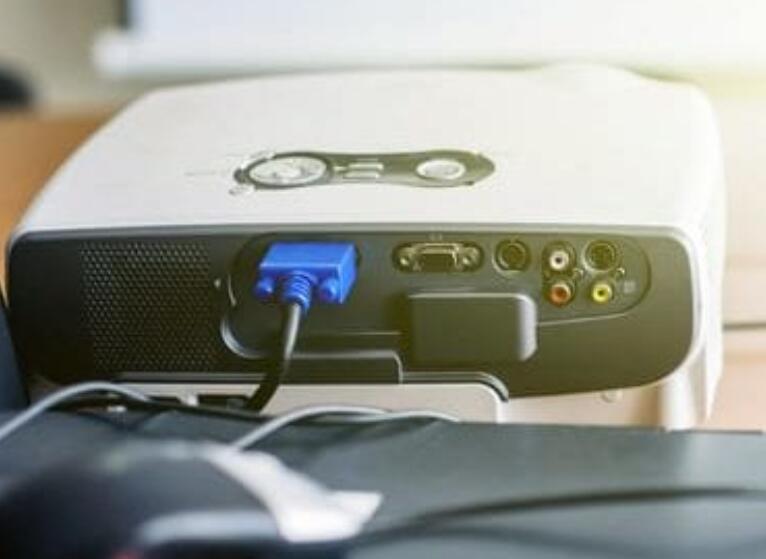
Now it’s time to make connections. Note you still haven’t permanently mounted anything. You definitely want to make sure everything works before you secure it all in.
So now’s the time to run that extra-long HDMI cable. This is the ideal, over wireless or connecting multiple sources to the projector itself, as it gives you the most flexibility and the highest frame rates and resolutions. It does, however, mean you’ll need a receiver or soundbar to connect and switch your sources. A good idea anyway, as you should never rely on the speakers in a projector for sound.
Once it’s all connected, check some different content. If you have a 4K projector, make sure you watch some 4K content to make sure your system can handle that resolution. Just because it can handle 1080p doesn’t mean it can do 4K.
6. Set up the projector
You will likely need to do some image alignment and adjustment to get the image from your projector to the right size and perfectly centered on the screen. If you’re mounting the projector, do this before you secure the hardware so you can make sure you’re putting it in the right place. Put the projector on top of a ladder to get it to the right height until you’re ready to make the placement permanent. If the projector’s location is fixed because of the constraints of your space, you could alternatively wait to permanently mount the screen, changing its placement to adjust the image size.
The kind of adjustments you can make to the image vary from projector to projector, and can include zoom, alignment, and inversion options. Many projectors offer keystone adjustment that let you position the projector at an angle to the screen without skewing the picture. If yours doesn’t, you’ll need to make sure the lens is directed head-on toward the screen.
Some projectors will have an on-board wizard that walks you through configuring your settings, sound, and picture. It may or may not be as easy as plugging everything into the right ports. If you get stuck or confused, you’re probably not the first one. There are tons of video tutorials out there that can help with the specific quirks of certain models or set-ups, and likely at least one will have the answer to your question.
7. Check your sound and content sources
Before you call it a day, double-check that everything has been hooked up correctly. Finding and fixing any problems rights away is a lot less frustrating than finding out about them as you’re sitting down to watch your favorite show.
Play a quick game on your PlayStation, start a show on Netflix through your FireStick—whatever you’d normally do when you sit down to enjoy your projector. Test that both the sound and picture are working and that they’re in alignment on all input channels before you call it a day.
8. Turn off the lights and enjoy
Now when you are done with setting up your projectors, it’s time to relax and enjoy your home theater. Turn your lights off for a better home theater experience.