If you’re looking to give a presentation, watch a movie, or play video games on a larger screen than your laptop provides, connecting your laptop to a projector is a great solution. With just a few steps, you can connect your projector to your laptop and enjoy a bigger and brighter display.
In this article, we’ll guide you through the steps to connect your laptop to a projector.
Contents
Step 1: Check your laptop’s video ports
The first thing you need to do is check the video ports available on your laptop. Most laptops have either a VGA or HDMI port, but some newer models also have USB-C or DisplayPort. You need to make sure that the video port on your laptop matches the video input on the projector.
Step 2: Connect the projector to a power source
Before connecting the projector to your laptop, plug it into a power source. Most projectors come with a power cable, so just connect it to an electrical outlet.
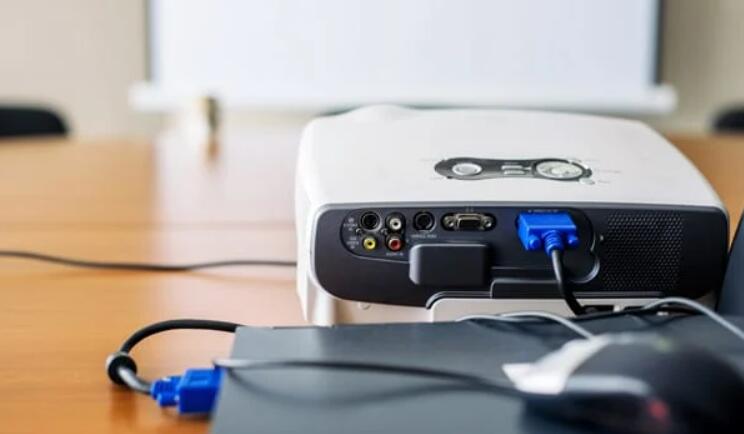
Step 3: Connect the projector to your laptop
Once the projector is plugged in, use a VGA, HDMI, USB-C, or DisplayPort cable to connect your laptop to the projector. Connect one end of the cable to your laptop’s video port and the other end to the projector’s video input.
If you’re using a VGA cable, you’ll also need to connect a separate audio cable from your laptop’s headphone jack to the projector’s audio input.
Step 4: Turn on the projector and laptop
Turn on your laptop and then turn on the projector. Most projectors have a power button on the top or side of the unit. Once the projector is turned on, it should automatically detect the laptop and display the laptop’s screen.
If the projector doesn’t display the laptop’s screen, you may need to press the “Input” or “Source” button on the projector’s remote control to manually select the video input.
Step 5: Adjust the display settings
After the projector is displaying the laptop’s screen, you may need to adjust the display settings on your laptop to optimize the image quality.
On a Windows laptop, you can right-click on the desktop and select “Display Settings” to adjust the resolution and orientation of the display. On a Mac, go to “System Preferences” > “Displays” to adjust the display settings.
Step 6: Start your presentation or video
Now that your laptop is connected to the projector and the display settings are adjusted, you can start your presentation or video. Just open the file on your laptop, and it should display on the projector’s screen.
Step 7: Disconnect the projector
Once you’re finished using the projector, it’s important to disconnect it properly to avoid any damage to the device. Turn off the projector and unplug it from the power source. Then disconnect the video cable from your laptop and the projector.
In conclusion, connecting your laptop to a projector is a simple and easy process. Just make sure you have the right video cable for your laptop’s video port and follow the steps above. With a few clicks and adjustments, you’ll have a larger display to enjoy your presentations, videos, and games.