Acer America is about to bring lasers to the classroom, boardroom and any government offices that pick up the K520 hybrid laser-LED projector. The K520 uses hybrid laser-LED technology that has an exceptionally long life span, reducing maintenance and lamp replacement costs while also providing a great picture.
Laser lights burst onto the scene in the projector market this year, making a bid to replace standard bulbs that were always the Achilles’ heel of that form of display technology. Bulbs degraded over time, becoming weaker and reducing color accuracy. Laser lights degrade over time as well, but much more slowly, leading to more than quadruple the average lifespan of a typical bulb. Hybrid laser-LED bulbs can achieve 20,000 hours of life with little or no picture degradation.
The hybrid technology is a system of LED light and lasers. Its wide color gamut and up to 85 percent color saturation create deep color tones. It also delivers a high brightness of 2,000 ANSI lumens, or 1600 ANSI lumens in Eco mode, and has an instant on/off capability that lets users turn it off right after use without waiting for it to cool down.
Contents
Best Acer Projector Reviews 2024:
1. Acer C250i Portable Projector
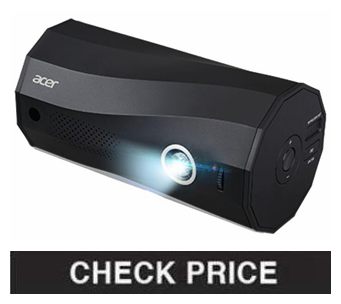
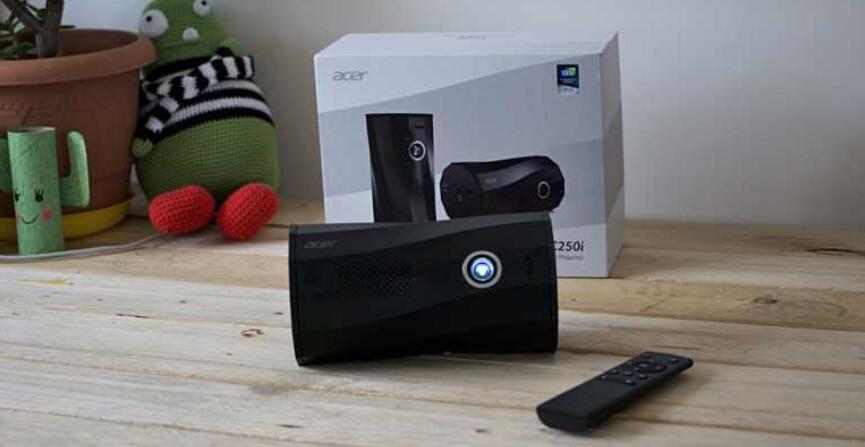
The Acer C250i Portable Projector has a highly distinctive appearance for a projector. At a glance, it’s hard to tell what kind of beast the C250i is: A vase? A twisted log? An all-black barber pole? But for all its unique styling, form does follow function, and it’s a fitting design for an entertainment projector/Bluetooth speaker mashup that’s unusually versatile in how it can be positioned.
When set upright, it can mirror a smartphone’s screen and project videos and other content in portrait mode—in what Acer calls Auto Portrait Projection. When placed on its side, it projects in landscape mode. It also can be tilted at a wide range of angles. It’s flexible; we just wish it were cheaper.
A Projector With a Twisty Style
At 7.5 by 4 by 4 inches (HWD), the C250i is larger than other entertainment mini-projectors we have reviewed recently, and is suitable for either portable or home use. As it can be positioned in several orientations, I am treating its height as its longest dimension, and standing-tall portrait as its default configuration. When so positioned, the center of the lens is 5.5 inches above the tabletop or other surface the projector is placed on, giving it exceptional clearance for a mini-projector. Above the lens is a small plastic focus wheel, which, alas, proved difficult to use to bring the image into precise focus.
The C250i has two threaded holes that can fit a tripod. One is on its base, and the other is on its side, a quarter of the way around from the lens. The second hole is for when the projector is in landscape orientation. The cylindrical-looking projector is actually 12-sided, with each side employing a twist that gives the C250i a stylish, swirled appearance. In practical terms, the projector can be set on any of its 12 faces, so that the lens can be pointed horizontally for wall or screen projection, vertically for a ceiling projector, or at various downward or upward angles.
- Distinctive design
- Auto portrait-mode projection
- 1080p resolution
- Can project at a variety of angles
- Long-lasting battery
- Many connection methods
- Large for a mini-projector
- On the pricey side
- Lacks built-in Android
- Tricky to accurately focus
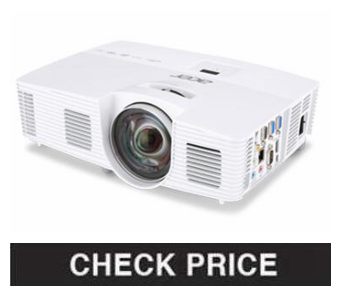
2. Acer H7550ST
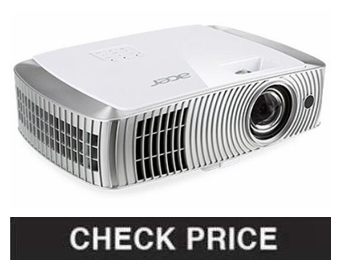
The DLP-based Acer H7550ST delivers a constellation of features—including 1080p (1,920-by-1,080) resolution, a 3,000-lumen rated brightness, and a short throw combined with a modest zoom—that make it a strong candidate as a home-entertainment or low-end home-theater projector. Its Achilles’ heel is that it shows rainbow artifacts just often enough that they could be annoying to anyone who sees them easily. However, it delivers otherwise high-quality video. For those who aren’t bothered by rainbow artifacts, the H7550ST is a tempting choice.
As with most of its close competition, including the Optoma HD28DSE and the Epson Home Cinema 2040 3D 1080p 3LCD Projector, which is our Editors’ Choice moderately priced 1080p home-entertainment model, the H7550ST is well suited for gaming, with a short lag time for a projector.
Compared with the Optoma and Epson models, the H7550ST is notably bigger and a little heavier, at 3.9 by 14 by 9.5 inches (HWD) and 7 pounds 8 ounces, which makes it more cumbersome to carry with you to a friend’s house for a movie night or gaming. However, it’s still small and light enough that if you don’t have room for installing it permanently, you can store it away and then set it up quickly and easily when you want to use it. Acer even supplies a soft carrying case with reinforced side panels.
- Native 1080p resolution
- Bright
- Short throw
- 1.1x optical zoom
- Supports 3D for video sources, like Blu-ray players
- Comes with two pairs of 3D glasses
- Shows rainbow artifacts in video, particularly for black-and-white source material
3. Acer K138ST
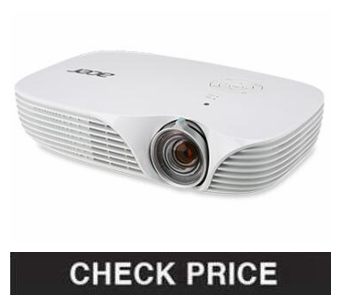
The Acer K138ST is a highly portable projector for business or casual use, with a relatively short throw for an LED-based model. The addition of an MHL-enabled HDMI port lets it project content from a smartphone. Video quality isn’t great, however, both due to posterization and a considerable rainbow effect. The InFocus LightPro IN1146, our Editors’ Choice LED projector, shows better video and has more connection choices.
Design and Features
The K138ST is a handsome projector, white with a flat top, curved sides, and rounded corners. It measures 2.3 by 9.4 by 5.8 inches (HWD), making it a little larger than palmtop size and smaller than the InFocus LightPro IN1146. It’s lightweight at 1.7 pounds, and it comes with a soft carrying case.
This DLP-based projector has native WXGA (1,280-by-800) resolution, a rated brightness of 800 ANSI lumens, and a 100,000:1 rated contrast ratio. Its LED light source is rated at 20,000 hours in Normal mode and 30,000 hours in Economy mode, so the bulb should easily last the lifetime of the projector. Its throw ratio of 0.8:1 is at the upper limit of what we would consider a short-throw projector. This lets you place the projector a bit closer to the screen for a given image side than a standard-throw model.
On top of the K138ST is a four-way controller with center button that you can use to access the menu system, as you can also do with the projector’s small remote. Behind the lens is a focus ring. As is the case with most short-throw—and most mini—projectors, it lacks an optical zoom.
- Compact
- Lightweight
- Can project content from a smartphone
- Short throw distance
- Comes in soft carrying case
- Limited connection choices
- Rainbow effect in video
- Scaling artifacts visible at projector’s native resolution
4. Acer S1385WHne
If you need a WXGA (1,280-by-800) projector that’s bright enough to give you a suitably large image for a midsize conference room or classroom, light enough to carry, and equipped with a short-throw lens so you can get a big image from close to the screen, put the Acer S1385WHne at the top of your list. It’s rated at 3,200 lumens, weighs less than 6 pounds, and even comes with a carrying case. Add in its high-quality output for data images, and it’s an obvious pick as our Editors’ Choice moderately priced, short-throw WXGA projector.
The S1385WHne is a head-to-head competitor with the ViewSonic PJD6683ws , another top pick. Both are built around DLP engines and both offer the same resolution, similar brightness, a short throw, and typical DLP features, like 3D support. However, the Acer model offers a slightly higher brightness rating, a slightly lower weight, and some additional features, including two HDMI connectors with Mobile High-Definition link (MHL) support.
Portability, Connections, and Setup
Measuring 3.4 by 12.1 by 8.3 inches (HWD) and weighing 5 pounds 5 ounces, the S1385WHne is in a size and weight class that’s appropriate for permanent installation, for placement on a cart, or for being stored away when its not in use and taken out only when you need it. It’s also small and light enough to carry with you if you need to, at least occasionally, and the soft carrying case it comes with makes it easy both to carry and to store safely.
Setup is typical for a short-throw projector, with a manual focus and no zoom. For most of my tests, I used a 92-inch image, measured diagonally, with the projector just 39 inches from the screen.
- Light weight
- Bright
- Short throw
- Native 1,280-by-800 resolution
- Near-excellent quality for data images
- Potentially annoying rainbow artifacts with full-motion video
5. Acer H6517ST
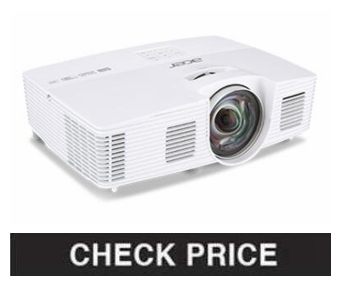
With its 3,000-lumen rated brightness, 1080p (1,920-by-1,080) resolution, and full 3D support for video devices like game consoles and Blu-ray players, the Acer H6517ST is an obvious candidate if you need a home-entertainment projector. It also delivers some features that make it stand out from the crowd, including a short-throw lens to give you a large image from close to the screen, and a short lag time, which will make it attractive to gamers. If you’re looking for a projector for home, and especially one for gaming, the H6517ST definitely belongs on your must-see list.
As with most home-entertainment models, including the Acer H6510BD Projector and the Optoma GT1080, which is our Editors’ Choice home-entertainment projector particularly well-suited for gaming, the H6517ST is small and light. It weighs only 5 pounds 8 ounces and measures 3.7 by 12.4 by 8.8 inches (HWD). Acer even includes a soft carrying case so you can bring it with you—to a friend’s house for example—or store it away easily and then set it up quickly when you want to use it. If you need portability, that gives the H6517ST an important advantage over projectors like the LCD-based Editors’ Choice Epson PowerLite Home Cinema 3500, which weighs nearly three times as much.
However, the Epson 3500 has advantages of its own, including a guarantee to be free of rainbow artifacts, thanks to its three-chip LCD design. The H6517ST shows fewer of these artifacts than many DLP models, but they still show at least occasionally.
- Native 1080p resolution
- Bright
- Short throw
- Supports 3D for video sources like Blu-ray players and game consoles
- Short lag time
- Potentially annoying rainbow artifacts that show primarily in black-and-white source material
- Underpowered audio with no audio output
6. Acer S1383WHne
The Acer S1383WHne is a short-throw data projector largely geared toward classroom use. The S1383WHne provides sharp text and a solid range of connection choices. Though its overall image quality is mediocre, it’s a good choice for a budget-conscious school or business.
Design
As a short-throw projector, the S1383WHne can throw a large image from relatively close to the screen. It has WXGA (1,280-by-800) native resolution, a 16:10 widescreen aspect ratio, and a rated brightness of 3,200 lumens. It is reasonably portable at 3.7 by 12.4 by 8.8 inches (HWD) and 6.2 pounds, though it lacks a carrying case.
Like most short-throw projectors, the S1383WHne has a focus wheel behind the lens, but it lacks a zoom ring. It has an atypical connection port arrangement, which we’ve only seen on a few other Acer projectors. All the ports are on the left side instead of in the back, and are tilted 90 degrees from their usual orientation, into a compact, square arrangement.
The port selection itself is good for a classroom or business projector. There are two VGA-in ports for connecting with computers, plus a VGA-out port for connecting with a monitor. For video, there are an HDMI port that supports Mobile High-Definition Link (MHL), an S-Video port, and an RCA jack for composite video, plus a corresponding audio-in port. There’s also an Ethernet port for connecting to a LAN, a USB Type B for remote mouse control, a microphone jack, an audio-out port for connecting a set of powered external speakers, and a slot for a Kensington lock. It lacks a USB Type A port that would fit a thumb drive or a wireless adapter.
- Good text quality
- Short throw
- Loud, good-quality audio
- Portable
- Rainbow artifacts in video
- Lacks port for a USB thumb drive
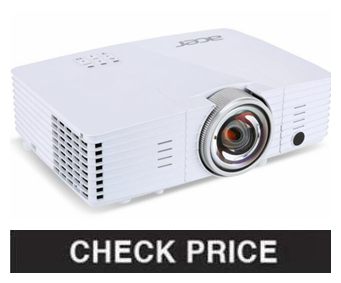
7. Acer P7505
Designed for applications that need to put a lot information on screen at once, the Acer P7505 projector offers a 1,920-by-1,080 resolution. That’s suitable for, say, a complex engineering drawing with lots of fine detail, or four windows at once, with each one showing a little more detail than a single SVGA screen. Together with the 5,000-lumen brightness rating, it makes the P7505 of obvious interest to anyone who needs to show a lot of detail in an image that’s big enough for a midsize to large room.
The P7505 has a lot in common with the BenQ MH680 and BenQ SH940, two other 1,920-by-1,080 projectors that are meant for business use. In particular, all three handle data images, but not video, well, and they all offer a step up in resolution from the 1,400-by-1,050 Editors’ Choice Canon REALiS SX80 Mark II.
One other key feature the P7505 has in common with both BenQ models is that it’s DLP-based. The Canon SX80 Mark II is built around an LCOS engine, which gives it better image quality despite the lower resolution. The Canon model also offers unusually capable color management, which makes it a particularly good choice for showing photos at top quality.
Whatever the advantages of the Canon SX80 Mark II, however, the P7505 delivers on the single most important issue for a high-resolution data projector by doing a good job with fine detail in data images. It also offers the highest brightness rating of these four models, potentially giving it the edge when producing large, bright images.
- Bright, 5,000-lumen rating
- 1,920-by-1,080 resolution
- 2x zoom lens
- Good sound and data-image quality
- Usefulness for video is limited by rainbow artifacts and annoyingly obvious digital noise
How to Connect a Laptop to a Projector?
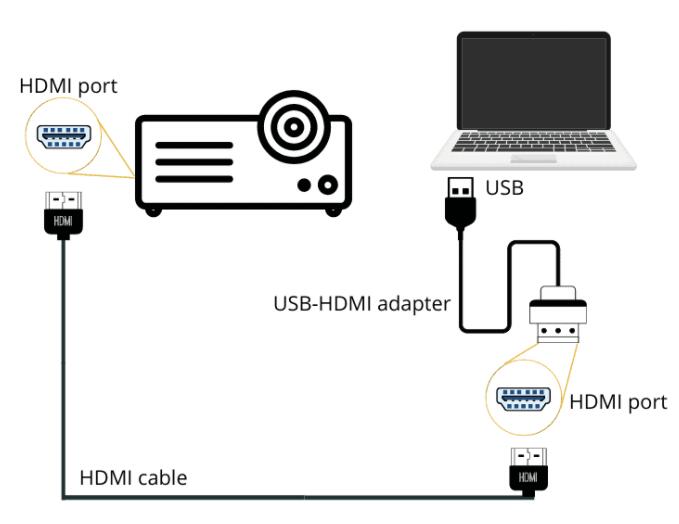
1. Make sure your computer and laptop are both turned off.
2. Connect the video cable (usually VGA) from your laptop’s external video port to the projector. (Unsure what video output you have? View our video connection guide.)
3. Plug your projector into an electrical outlet and press the “power” button to turn it ON.
4. Turn on your laptop.
5. If you need audio for your presentation, connect the laptop’s “audio out” port to the projector, or to another sound system.
6. Sync the projector and laptop by holding down the FUNCTION (Fn) key and pressing one of the following keys to toggle: F4, F5, F7, F8
- (Note: Depending on your computer, you may have to use a different F key than those listed above.)
How to Install a Projector on a Ceiling: 6 Steps
Step 1: Work out the centre of the screen
You’ll need to mark the wall opposite the screen with the centre point of your projector screen – i.e. measure the width of your screen and divide it by two. Ultimately you want the lens to be central (width-wise) to the screen. By marking the opposite wall you can then use a large square to draw a light line on the ceiling towards where the projector will be installed.
There are various ways to do this, I’ll not cover all that in this article – just look up the ‘3-4-5 triangle rule’ and you should be fine from there. You don’t need to be millimeter accurate so don’t over-think this… but if you’re miles out your picture will be skewed.
Step 2: Calculate the throw distance
The key thing you need to get right when installing a projector is working out the throw distance. This is different for different projectors and you should be able to find this out before making your purchase. Most projectors are fine for most ‘average’ size rooms but if you live in a castle you might want to double check the specs.
For this particular projector (see 4m 8s in the above video) you can see from the instruction manual that for a 90″ screen the projector LENS needs to be between 2.3m (2278mm) and 2.9m (2962mm) from the screen. So I’ve measured from the projector screen and marked the ceiling at 2.3m and 2.9m – put these marks on the line I drew in step 2. The projector needs to be installed so that the lens is somewhere between these two marks.
Step 3: Work out projector height
Before you panic, if your ceilings are under 2.4m high this probably won’t be a problem and you can skip this section – ours are 2.3m high so the top of the projector screen is pretty much at the same height as the projector, which is perfect. However if you’re mounting your projector particularly high up, for example if you live in a house with incredibly high ceilings, then you’ll need to account for the maximum lens height.
For example with my projector used with a 90″ screen the maximum lens height is 56mm above the top of the screen, which isn’t far. Again, this varies between different types of projector. If you do have really high ceilings you either need a mounting bracket that will bring the projector down to screen level OR you’ll need a projector that can throw the image down at a more extreme angle.
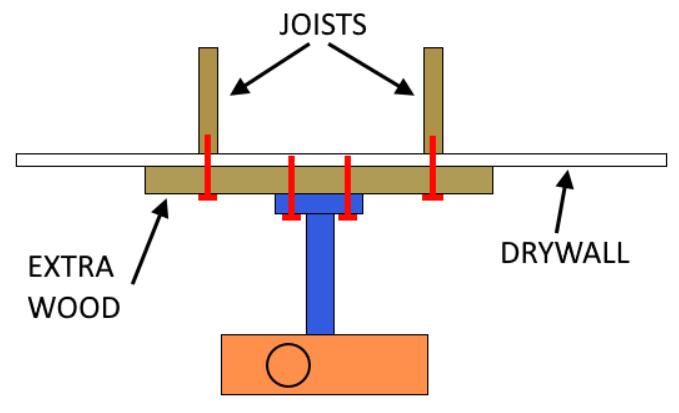
Step 4: Attach the projector to the ceiling
I suspect it would support WAY more than this before failing – in all seriousness the ceiling would probably fall down before this bracket would fail. I might test that at some point! Anyway, the projector weighs about 3kg – this bracket is fine. Don’t get me wrong, you can pay WAY more for prettier brackets and if you want to do that be my guest, but I don’t see any physical way this bracket could fail. If you’ve got money burning a hole in your pocket buy a better projector.
The first thing you need to do is attach the bracket to the projector using the supplied mounting screws. This can be a bit fiddly but if you’re good with Meccano you should be fine. It took me about 10 minutes to put the bracket together and get all the screw holes aligned. The bracket came with 4 mounting arms however my projector only has 3 mounting screw holes so I could get rid of one of the arms. Try to get the bracket as central to the projector (not the lens) as possible since you want the centre of gravity to be on your side. I talk about this in more detail on the above video.
Then work out where the bracket needs to go on the ceiling relative to the required lens position. You should find the bracket is NOT in line with the centre mark – it should be off-set to account for where the lens is on your projector (unless you have a projector where the lens is central).
I used 4 x expanding hollow wall anchors to attach the bracket to the ceiling – I installed these using a proper Fischer setting tool. If you want to know whether it’s safe hanging a projector using these fixings then please read the note at the bottom of this article. Use a spirit level to get your projector hanging as level as possible. This will make set-up easier later on.
Step 5: Install the cabling for the projector
There are a number of ways to crack this nut but the diagram below shows how I did it. Essentially the projector needs two cables connected to it – a power cable (comes with the projector) and an HDMI cable (doesn’t normally come with the projector) to receive the video signal from whatever you’re going to watch (Netflix etc.). How you route these cables to your projector is up to you – just don’t mess with electrics if you don’t know what you’re doing! Get an electrician to install a socket near your projector and you might even be able to pay them to install the HDMI cable neatly for you. Alternatively if you want to save your pennies just run the cables in trunking up the wal
For me life is made considerably easier by having an amp that switches all the HDMI signals for me and gives me a single HDMI feed to the TV that I can then split off to the projector.
If you don’t have an amp that can switch HDMI signals you can buy a cheap little HDMI switcher from Amazon for about £11.99 – I haven’t used this particular one but the reviews look fine so it should do the job. If you could find one with two outputs instead of one it negates the need for the HDMI splitter. I had a quick look and couldn’t find one though.
Step 6: Set up your projector
Close the blinds and curtains ’cause you’re ready to power things up for the first time! I’m assuming your projector screen is down at the correct height and your projector is level and ready to rock… oh, and don’t forget to take the lens cap off.
Don’t worry about the zoom for now, just get the focus right so you can read what’s on the screen. The first thing you’ll probably need to do is invert the image from the projector. You’ll need to go in to the menu system to change this, or you’ll get a very sore neck. On this BenQ projector I needed to select the option that says ‘Projector Position’ and change it to ‘Front Ceiling’ – in other words the projector is in front of the screen on the ceiling.
You then need some sort of test pattern so that you can adjust the zoom and everything else. Again, on this projector it was simply a case of selecting ‘Test Pattern’ from the menu. With the test pattern displayed you can then adjust the zoom to get the image as big as possible on the screen. Every time you adjust the zoom you’ll need to re-focus the image. Then make any minor tweaks to the mounting bracket to get the image perfectly central on the screen, double check all of the screws are tight, do a final re-focus of the image, switch the test pattern off and you should be ready to rock!