If you’re teaching a class or giving a presentation, you might find it necessary or at least convenient to connect your computer to an external LCD projector. Thankfully, if you have a laptop or desktop computer that runs Windows, the operating system makes it relatively simple to connect the two devices so you can display what’s on your PC’s screen to whatever surface the projector is pointed at.
Before you get started, you’ll likely need to have either a VGA or HDMI cable to connect the devices. You’ll need an additional adapter if your laptop lacks a monitor port. Once you have the necessary cables for your device, you can begin the process of getting Windows to recognize the device.
Contents
Projector Cable Types and Connections
There are two broad ranges you can divide into the types of connections or cables a projector supports, which are – digital cables and analog cables. HDMI, DisplayPort, Ethernet, DVI, Optical are digital cables. Analog cables include VGA, Component Video, S-Video, Composite Audio & Video, 3.5mm input, 3.5mm output, etcetera.
USB connector and 12V trigger work with both analog and digital connections, and therefore, does not fall under the two categories. In the next section, I will talk about the most relevant ones of these cable types and their uses in thorough detail.
HDMI ( High Definition Media Input )
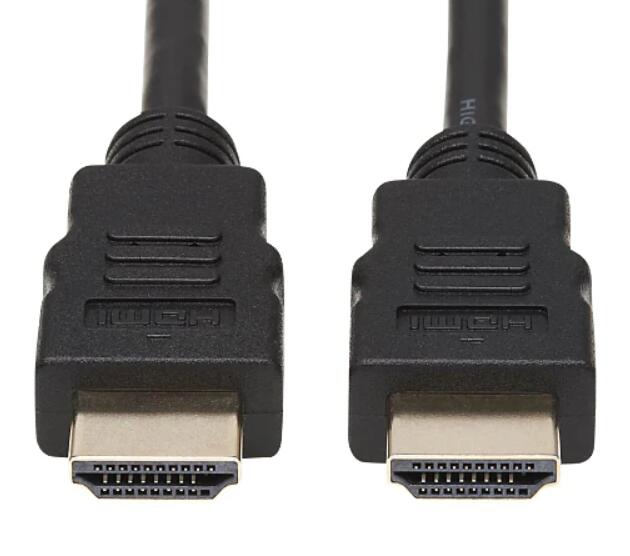
High Definition Media Input (HDMI), although proprietary, is a wildly successful digital video and audio transfer interface. Uncompressed digital video & audio is transmitted by HDMI cables with only one single cable.
A group of electronics manufacturers including Toshiba, Sony, and Sanyo has created HDMI for transferring uncompressed video and either eight-channel compressed or uncompressed audio into digital TVs, computers, Blu-ray or DVD players, and more.
HDMI 1.4 can support up to 4096 x 2160 high-resolution videos and 192 kiloHertz 24-bit uncompressed audio; you can also use it for transmitting 3D videos. The newer version, HDMI 2.1, was announced earlier this year, which can support 48 GB per second.
This type of cable features Consumer Electronics Control (CEC) connection, which enables the user to operate several devices with a single remote control; it also permits HDMI devices, if necessary, to control each other.
And HDMI cables have backward compatibility with older HDMI versions and DVI devices for videos. The conversion type is pin-to-pin, so ideally, there should not be any detectable signal loss. However, because DVI devices do not support audio, DVI-to-HDMI conversions can not carry the 8-channel audio data.
DisplayPort
This cable and connection type is very comparable to our previous topic of discussion, HDMI. One difference is DisplayPort is license-free, unlike HDMI. It was designed in 2006 by the Video Electronics Standards Association (VESA).
Previously made to connect display devices to video sources, DisplayPort can transmit both audio and digital images now.
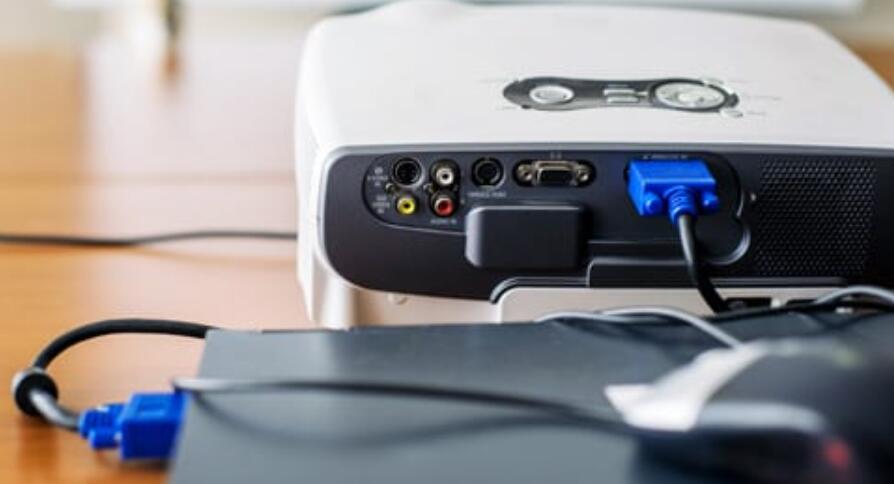
Video Graphics Array (VGA)

VGA is one of the oldest connectors among the ones discussed in this article. It was developed in 1987 by International Business Machines (IBM). Essentially, VGA is a 15-pin connection made to transmit images; it only works with analog signals.
Compared to other analog connectors, VGI can give you a higher quality image. It supports image resolutions at a maximum of 640 x 480 pixels in 16 colors. There is another mode called 13h, which uses 256 colors at a lower resolution of 320 x 200 pixels. You may use whichever version you prefer.
RGBHA video signals (R stands for Red, G for Green, and similarly the rest stands for Blue, Horizontal Sync, Vertical Sync) can be carried by VGA cables. A VGA socket is usually colored blue and has 15 pins in total with 3 rows having 5 pins in each. There are two screws attached to the cable for a secure connection.
And VGA is very rarely used now; the 13h mode was used in computer gaming in the late 80s and early 90s. You will only see it in older hardware because it has been replaced by DVI and HDMI in the later years, both of which are backward compatible with VGA to prevent obsolesce.
Digital Video Interface (DVI)

DVI was designed by the Digital Display Working Group as the digital successor of VGA in 1999. It is specifically made for video sources as it connects them to a display device such as projectors or monitors. This cable can transmit uncompressed videos from a source device to the display device.
These cables are equipped with small screws that you have to use for a more secure attachment to the device.
Ethernet
Ethernet cable is used for connecting to a home or a corporate network; it basically connects devices under the same Local Area Network (LAN). Usually, Ethernet links computers, smart TVs, Macs, NAS Drivers, and even projectors, to switches and routers. You could also use this to connect two devices.
Generally, Ethernet cables support data transfer rates up to the industry standard, which is called Category 6 (CAT6). This means that you can use an ethernet cable to transmit data, audio, and video up to 4K resolution.
Universal Serial Bus (USB) Connections
Out of this entire list, USB cables are probably the most used by you in your everyday life as they are quite common. There are multiple types of USB connections and cable types you may have heard of. The most common one is USB C, most frequently used for phones and laptops as chargers and file transfer cables.
Because of their widespread use, projectors also support them for the sake of convenience. You can use USB drives or hard drives with USB cables to directly view stored data from an external storage media. Moreover, you can also connect your smartphone or laptop to your projector using USB cables.
How to connect your PC to a projector
1. Ensure both your laptop and your projector are powered off before connecting the two via the VGA cable, HDMI cable, and/or additional adapters.
2. Plug your projector into an electrical outlet and turn it on. Power up your laptop as well.
3. Depending on your laptop, press the “Fn” key on your keyboard as well as either the F4, F5, F7, or F8 keys to bring up the display settings — which key you press depends on your particular laptop.
4. Once your display menu launches, choose whether you want to duplicate what’s on your laptop’s screen, extend to create a full picture (i.e. when looking at an image in detail that is larger than your computer’s screen can handle), use only the projector, or toggle the projector off altogether.
How to connect your laptop to a projector
1. Make sure your computer and laptop are both turned off.
2. Connect the video cable (usually VGA) from your laptop’s external video port to the projector. (Unsure what video output you have? View our video connection guide.)
3. Plug your projector into an electrical outlet and press the “power” button to turn it ON.
4. Turn on your laptop.
5. If you need audio for your presentation, connect the laptop’s “audio out” port to the projector, or to another sound system.
6. Sync the projector and laptop by holding down the FUNCTION (Fn) key and pressing one of the following keys to toggle: F4, F5, F7, F8.